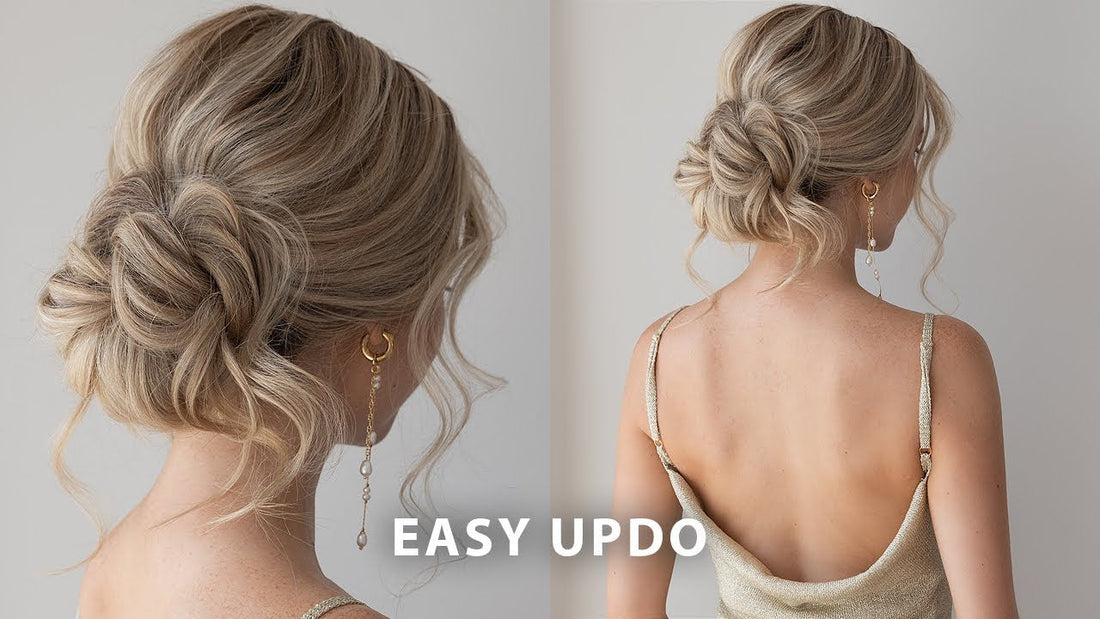
Elegant Wedding-Ready Updo Tutorial
This step-by-step tutorial will guide you through creating a beautiful and voluminous updo, perfect for weddings or any special occasion. With a focus on texture, volume, and movement, this look is designed to be elegant yet effortless, incorporating curls, teasing, and secure styling to create a polished finish.
- Prepare Your Hair: Start by curling your hair away from your face using a 1-inch barrel for movement and volume. This step is optional, but it adds a soft, natural look.
- Tease the Crown: Tease the hair on your crown and the back of your head to create volume. Gently tease with downward motions to prevent tangling, and don’t be afraid to tease more than you think you need.
- Add Texture Spray: Spray a generous amount of texture spray throughout your hair. A light, non-drying spray like Moroccan Oil adds volume and texture for a more effortless finish.
- Section Your Hair: Start by sectioning off the hair around your face, about one inch back from your hairline. Leave the rest of your hair behind your shoulders for now.
- Section the Lower Hair: Gather the remaining hair in the back loosely, and create a section just below the top of your ears. This section will be divided into three parts: the right, left, and a small section in the middle.
- Create the First Bun: Smooth back the hair at your crown, and secure it with a thick hair elastic. On the last loop, pull the hair partially through to form a small bun.
- Pinch and Shape: Gently pinch the bun with one hand while pulling small sections of hair around the crown with the other hand. Repeat this process to shape your bun, creating a voluminous and textured look.
- Build the Updo: Grab the lower hair sections and tie them together above your bun. Cross the left section over the right, pull the ends up, and secure them tightly like tying your shoes. Use a pin to hold it in place.
- Create the Second Knot: Join the ends of the lower sections with the ends of your bun. Tie them together in a similar manner to create a second knot just below the first one.
- Secure and Finalize: Pin the sections into place, tucking any excess hair underneath the bun. Frame the face with the front sections, creating a swoop behind the ear. Add bobby pins to secure everything and finish with hairspray. Optionally, add some hair perfume for a luxurious touch.